My Music My Art

Showing posts with label acrylics. Show all posts

Wednesday, December 12, 2018

Yes, yes U can

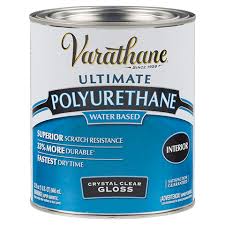
So the question is; can I use a polyurethane to seal my paintings? I contacted Rust-o-leum and they recommended using their Ultimate Water-based Polyurethane to seal my acrylic paintings. I was a bit skeptical at first but decided to give it a try anyway on a throw away painting so I went to my local home-improvement store and bought an 8 oz matte finish can of the Ultimate water-based Polyurethane. Make sure that it is the the Ultimate Polyurethane water based as below because there are many different Poly's which will damage your painting.

gloss can of Ultimate Polyurethane


It also comes in Gloss, semi gloss and Satin. There is an 11.5 oz. spray as well. I prefer not to use sprays because the spray gets into the air and spreads everywhere not only that but I end up breathing it in. I'm already battling cancer and don't need to add to it. The can stuff is milky white as I opened it and rather than shaking it, stirred was preferred. Read the label. I noticed only a light odor. Even though the color in the can is white, it brushes on clear. It won't yellow nor darken your painting in time.

I applied it to my painting that was on art paper with a brush and, wow!,the results were the same as if I used  known water based sealers acquired from art stores. I only put on two coats rather than 3 as recommended for use on wood. I figured that it would suffice for my purposes and made sure that it covered all of my painting well. I would normally have used this on my hard board panels but for my experiment I used special paper for art, I like the 11"x14" but below is a 9"X12".

pic of 9"x12" art paper


It did not change the color of my painting nor did it leave a film on it making my painting dull. It made the colors stand out rather than blending in as acrylics often do when using similar colors. The sealer actually brought out the colors and I could see them as individual colors.

The sealer dried within 5 minutes rather than the 2 hours stated on the can but waited the 2 hours anyway to put a second coat. I was impressed by the lack of strong lingering odor other sealers have. The little odor is tolerable and disappears within a couple of hours.

I'm very impressed by the Verithane Water Based Ultra Polyurethane as it did exactly what I was hoping for and recommended to me by Rust-o-leum. The stuff is however toxic before it dries so you don't want to inhale the fumes. I didn't have a problem with it as it was at my waste level all the time and the fumes stayed low to the can. Clean up was easy, just a rinse with water did the trick. I should point out that I used the sealer indoors and the furnace was just behind the door eight feet away.

I ended up sealing about 10 painting with the same results. I am impressed! I should point out that there is an oil based Ultra Poly as well which I will check out at another time. Try the water based poly on one of your throw away painting and see if you agree. The cost of it for an 8 oz can was under $5 at Menards. I would have never thought that I would be using a polyurethane as a sealer for my paintings. It's a keeper!

Here's a few paintings I did on paper using Ultimate Poly:

a painting with a Polyurethane sealer

a painting with a Polyurethane sealer  


Wednesday, September 19, 2018

FolkArt 789 Clearcote Acrylic Sealer Matte

I use a lot of Plaid paint products including folkart. I though that I would give their clearcote a try and found this:


WARNING: Cancer and Reproductive Harm – www.P65Warnings.CA.gov

Soft matte finish. This product may not be purchased by those under 18 years of age.

I got this :
  • Ideal for professional artists and decorative crafters
  • Soft Matte finish
  • For use on wooden, wicker, florals, metal, canvas or any paintable surface
  • Non-yellowing finish
  • Waterbased-non-toxic 
from Amazon.com. where I purchased my 12 oz can. Notice it says non-toxic just above and yet Plaid has a warning that it can cause cancer etc. and may not be purchased by anyone under 18.

folkart 12 oz can of clearcote


I used the matte on several paintings and noticed a very strong and lingering odor. As always I use any of these sealer's outdoors. It's as bad as using turpentine indoors to clean your oil brushes, it'll smell the entire house. This, like other sealers is also highly flammable and could easily start a fire if you have a furnace or a water heater with a pilot light. DON"T DO IT! USE IT OUTDOORS!

Not only did I use this stuff outdoors, I also wore a painters' respirator to eliminate the breathing of any of the mist. I already have one form of cancer and don't want to end up with lung cancer as well.

So how'd the stuff work out? It's probably my favorite to use as it has an outstanding result. For oils I would suggest Krylon Kamar varnish. This is only meant for water based paints.

The colors are bright and vibrant and even the colors that ended up almost hidden in the background became clearer. It does not change the colors nor does it yellow. It does give you a much wetter look which has to do with bringing out contrast as in a photo shop program.

I don't recommend using this clearcote or others unless you are willing to go the extra mile to protect yourself, from the hazards involved, which most of you won't. They can make a non toxic brush cleaner for oils and yet in this age, they can't do the same for a sealer/clearcote spray for acrylics and oils. So are they waiting for more people to die from cancer before it happens? Crazy!


Saturday, September 8, 2018

can I use Rust-Oleum clear coat on my artwork

I've been wondering about that myself for a long time and decided to try it. Why not? After all it is 3x cheaper than other sealers of the same size used in art. I found a can of Rust-Oleum 2X clear Satin spray paint in my studio so I decided to give it a try.

Rust-Oleum Painter's touch 2X Satin Clear
I chose more than one acrylic painting for the experiment. I knew I could retouch them if it didn't work out since the sealer is a water base product.

After spraying a few paintings with this stuff, I decided to stop. The first one went on fairly easily as I sprayed very thin layers but I noticed the painting became cloudy after my last cover. I figured it needed to dry for a few hours so I set it aside and sprayed my second painting.

The spray didn't come out even and there was more of it in spots so I decided to just leave one coat on it and let it dry. The paint has a very strong lingering odor so I had to let the paintings sit in my garage for a few days to air out before taking it inside to scrutinize them.

This spray paint is toxic so whether you use it for other purposes, do it outside or in a garage with the door(s) open. I also wear a painters' respirator to keep the mist out of my lungs.

After a few days,I was able to take the paintings indoors and compare them to my other paintings I've sealed using acrylic sealers for artwork. Most of my acrylic paintings are either on canvas boards or hardboard panels I made for painting. In comparing the Rust-Oleum clear coat, the other paintings looked much clearer and brighter. The colors with the Rust-Oleum seemed to be faded and have a cloudy look to them.

In conclusion: Rust-Oleum Painter's Touch, 2X, Clear is not a good choice regardless of price. It does not go on or dry crystal clear as do other acrylic sealers made for acrylic paintings so I can not recommend using it on your artwork. Spend the extra money for a good acrylic sealer, yu won't be disappointed.

Sunday, July 8, 2018

Folk Art acrylic paint review

Paints are rated on a light-fastness scale that runs from 1 to 5.
1=Excellent
2=Very good
3=Good
4=Fair
5=Poor

All of the Folk Art Acrylic Paint Colors are rated Excellent or Very Good (1 or 2). These paints are made from some of the purest pigment available, which results in its superior quality.

folk art paint
This acrylic paint is thicker than the Apple Barrel acrylic paints, are slightly thinner than traditional acrylics and comes in a variety of colors and finishes. I like to use the matte finish since it's going on a painting and when dry, it gets a gloss sealer. Other finishes would be a waste of money for me for obvious reasons. I pay under a buck for each matte color at my local Walmart. The paint goes on very smooth and makes knife work a bit easier.

I could just use the Apple Barrel acrylic paints but every now and then I need something a bit heavier in viscosity so I turn to folk art paints. I've done plenty of paintings just using the folk art paints. The colors as with any acrylic paint dries darker than what you see when pouring it out to your palette so you may need to make some adjustments to enhance the color by adding a little white or yellow depending on what you are striving for. I usually end up having to add a few layers to my forefront to make them stand out. Often times the painting might look darker than I expected but when I add my acrylic sealant or a gloss varnish the colors seem to pop a bit more.

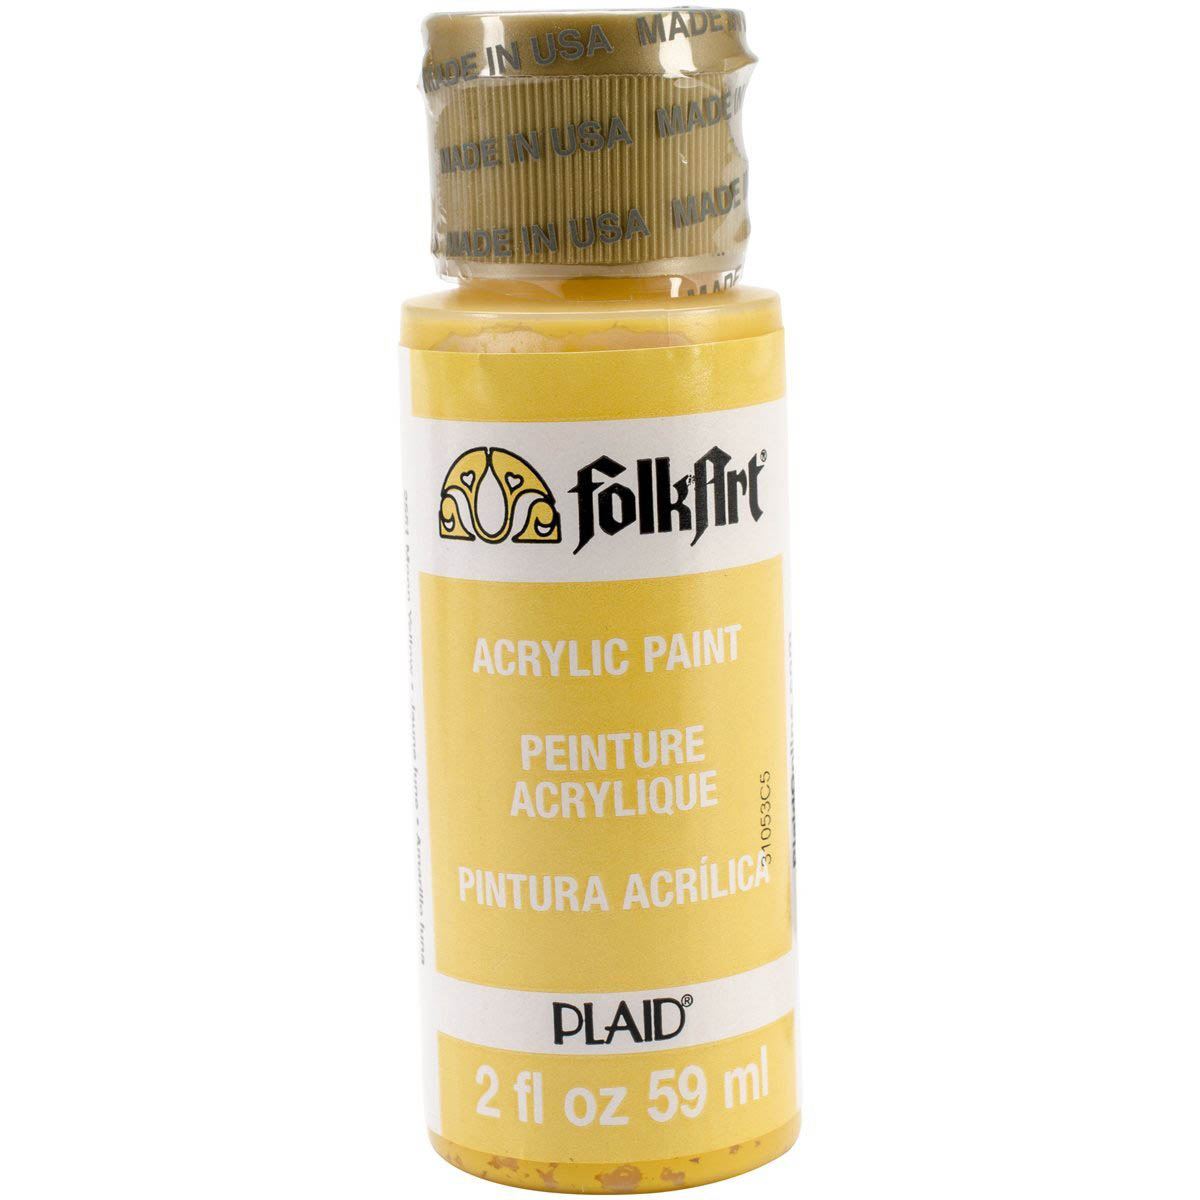
I do recommend using these paints. They are fairly inexpensive compared to the ones in a tube. They come in 2 oz and 8 oz bottles and are pour-able. The colors are vibrant and the paint has superior quality as the one's in tubes. Below are a few paintings I did using just the FolkArt acrylic paints by Plaid.

painting with FolkArt acrylic paints

painting with FolkArt acrylic paints

painting with FolkArt acrylic paints

painting with FolkArt acrylic paints


Saturday, July 7, 2018

Daler/Rowney acrylic paint paper review

Recently I stopped in at a local Walmart to buy an art paper pad for acrylics. I had used up my last paper and needed to stock up with my usual 9"x12" pad. I like to use these special papers for painting as they are inexpensive, light weight and are easy to store without taking a lot of space like stretched canvas would. Paintings look great on this paper and the colors get enhanced so much after putting on a sealer that sometimes it's hard to tell if the paint is oil or acrylic.

I paint for the sake of painting and unless I'm commissioned to do a painting, I"ll paint on paper. I live in an area where people will not pay much (over $50) for a painting, so I can offer them paper instead as long as it's good quality and has some decent weight. Weight of paper simply is determined how much pressure is used in creating it, i.e. 60# paper = 60# of pressure to make it. The higher the pressure the better the paper.

When I got to the area where the paper pads were, my usual paper pads were out of stock. All they had was Daler/Rowney 9"x12" Acrylic paper pad.

acrylic paper


I like to cut these papers into 8"x10" for inexpensive frame options as one can find them just about anywhere for fairly cheap. This paper is 115lb and come 10 sheets to a pad. My price was $2.97 + tax. It was cheap enough to give them a try to see how well this paper performs compared to my usual ones. I was in a pinch and didn't have time running around looking for my usual papers, so I bought one pad.

The next day I decided to try a sheet out and compared it to what I was used to. The paper was much thinner and smoother. Once I started prepping my paper with a thin layer of gesso, the edges began curling and the middle buckled out. I had also used some masking tape for a straight line, for an ocean horizon, which I do often with my other papers. When I pulled the tape off, it pulled a layer of paper along with it. I also tape the corners down to keep the paper flat and so that it won't move and was worried that the tape would pull off a layer from my corners.

During the course of painting on this paper, I notice that things just began getting worse with warping. It would even undo the taped corners from my table as I painted. Each time I painted a layer I would have to stop and let the paper dry totally, before continuing otherwise I'd have a rolled up piece of paper. To solve the problem of warping on my next painting, I added a few layers of gesso on both sides of the paper. That seemed to have eliminated some of the problem. With thicker paper I've never had a problem of warping nor the need for gesso. The papers come ready for painting.

Once I finally got my painting done, it looked good but the paper was rolled up after drying. No....I do not like this paper by Daler/Rowney nor do I recommend it! There are much better papers out there available. Here is a link regarding painting on paper and the outcome: http://www.justpaint.org/paper-warping-when-painting-with-acrylics/

Monday, July 2, 2018

Apple Barrel Paint Review

I do a lot of painting and most of it is done with acrylics. Unless I'm doing a commissioned painting, I will only use either Apple Barrel or Folk Art acrylic paints by Plaid.


I've had a lot of good luck using them, I like them and best of all they won't cost me an arm and a leg. As a matter of fact I pay 50¢ for Apple Barrel matte colors and 97¢ for the gloss paints at my local Walmart. I use the 2oz bottles although some come in 8oz bottles for a bit more than I would pay for 4-2oz bottles. There is a satin finish paint in the 2oz bottles which cost me about $1.29 a bottle. Prices vary from location to location so what you might pay for a 2oz bottle might vary.

Paints are rated on a light-fastness scale that runs from 1 to 5.
1=Excellent
2=Very good
3=Good
4=Fair
5=Poor

All of the Apple Barrel Acrylic Colors and Apple Barrel Gloss paints are rated Excellent or Very Good (1 or 2). These paints are made from some of the purest pigment available, which results in its superior quality.

I currently have at least 75 bottles and half of them are unopened. Since I paint daily, I go through a lot of paints and don't want to take the time out to run out and buy more if I run out during a painting. Whenever I'm in a Walmart, I'll just go ahead and buy a few bottles that I use more often. The problem with Walmart is that the paints seem to be out of stock often, that's why I stock up in advance. I know buying them on the internet will cost me  a lot more.

I've used them on just about every kind of painting from landscapes to portraits. The Apple Barrel paints are thinner than the traditional acrylic paints but work just as well for what I do. I've even used them on crafts and as long as I seal the paint with an acrylic sealer or varnish, they will last me a life time and then some.

I did have a problem about a year ago with the paint. They would smell like rotted flesh in the bottle and after I applied the paint. I contacted Plaid and received 50 new bottles for replacement. Fortunately I had a receipt for them all. Their answer for the smell was that someone had exposed the paints to extreme temps but I doubt that was the case. Never the less I have not had that problem since.

Here are a few paintings I did using just the Apple Barrel Matte acrylic paints.


squirrel in my backyard

Luna our dog

a bright fall day

a walk thru the forest preserve

melting ice on the lake

mountain side brook

sunrise at fall


Tuesday, May 17, 2016

Can I use the wet on wet technique with acrylic paints?

It’s a question that I’ve seen on the internet hundreds of times and yet no one has really explained their answer fully. I’ve seen plenty of no’s without any hope for a maybe. So just hold on to your horses and don’t give up quite yet.

Before I get into my discoveries on this matter I want to say that these are my personal findings after painting a lot of paintings. They have been found by trial and error. I paint daily about eight hours and often paint several paintings a day. I use both mediums, acrylics and oils and often times mix them. Yes the oils are over the acrylics after they have fully dried. I use acrylics for backgrounds cutting down on the toxicity levels not only in the brush cleaners but heavy metals such as cadmium, onyx oxide and cobalt among others in oil paints. So take this for what it’s worth. Read it all and then decide if you want to tackle this.

Using a wet canvas as with wet on wet oil painting where liquid white or liquid clear is used, there is nothing with acrylics to slow down the drying process in the same manner except for something like Liquitex Slo-Dri Blending Medium which is a retardant. But, it doesn’t quite  work the same way as the liquid/magic white or the liquid/magic clear. Trying to do the same technique as with oils is definitely a challenge.

Okay you made it this far, good for you! Keep going, don’t give up yet!

Perhaps if we changed the question slightly to “can we use an alternate method to wet on wet with acrylics?” then the answer would be yes. Let me explain a bit further. I think that the first thing to take a look at is why Bill Alexander re-introduce an old oil painting method and renamed it? His idea was to be able to finish a painting in one sitting as with acrylics, in many a case and be able to come back to it and make a few adjustments the next day if necessary. In traditional oil painting, before adding layers one needs to allow the paint to dry otherwise as Bob Ross states many a time, you will become a mud mixer. Bob Ross simply took it to another level and made it possible for the non artist to learn to paint without studying half your life.

When I first started painting I was using acrylics, painting abstracts. I got bored with it and wanted to do landscapes. I found Bill Alexander’s videos on You Tube and felt that this was the way to go. I didn’t feel comfortable with purchasing expensive oil paints, new brushes, easel and toxic brush cleaners so I wanted to stick to acrylic paints. So my challenge became, how was I going to adapt this method to acrylic paints? I wasn’t an artist, I was a professional jazz musician and a remodeler so challenges weren’t new to me. Whenever someone tells me that I can’t do something a certain way, it becomes a challenge and in most cases I find a way or an alternative with same or similar results.

Once I understood the properties of the oil paints and acrylics and how they work, I realized that instead of trying to keep my canvas wet, allowing them to dry before applying a new layer was the answer. Sometimes the drying process took too long so I helped it along using a blow dryer. I learned that using large brushes anywhere from one inch to four was still possible as with the wet on wet technique. I can paint the canvas or canvas board black or any other color I want to get a nice overall effect. As long as I use a transparent paint over the first coating, the color shows through. With transparent colors, I can add white to it as with wet on wet for a cool effect, but I have to be very quick as I have only about thirty seconds or less before it starts drying.

The problem with opaque acrylic paints in trying to add layers before they dry is, you become a mud mixer. The paints aren’t thick enough, even if you buy the professional ones that state heavy body. My solution to that was to add a thickening agent with the  paint such as a molding paste medium or similar to create texture. Acrylic paints dry flat and don’t show the brush marks as in oils, so in highlighted areas, I wanted to have texture which was done by adding a lot of medium to it, making the paint very thick. In this case instead of thinking that thin paint sticks to thick as with oils, the opposite became true using acrylics, as long as the paint underneath was dry.

There was only a little texture in this and brush strokes still didn’t show through. At least I can see the bumps created by the thicker paint which stick out adding a little depth. I could have tried just using the white molding paste first dabbing it with a small brush or knife, letting it dry and then adding my color to it, but I felt that it was just too much work involved and wasn‘t part of my experiment in using large brushes. You can try this yourself if you like.

I ended up painting about sixty acrylic paintings using large brushes before switching to oils. I also use numbers 2,4,8 fan brushes, 8,12 filberts, a number 0 liner brush and a plastic and metal paint knives. Some came out quite well while some didn’t. People loved them and asked to have them. I was flattered that someone would actually be proud to hang my artwork in their living or family room. Some have them in their bedrooms and hall ways. After switching over to oils to see how they work out, I find the wet on wet technique much easier and less challenging than with acrylics. With acrylics, you have to think and plan each move before applying the next layer although it is much easier fixing a mistake or a happy accident than it is with oils. The look of acrylic paintings isn’t the same as with oils and can be spotted easily enough as it has a lot to do with the brush stroke visibility in oils.

I still enjoy painting, using the large brushes with acrylics and every so often come back to them just for the challenge. I learned quite a bit learning the process with acrylics before getting involved with oils. I feel that it was a stepping stone to what I paint today and that includes portraits, birds, animals and still my favorite landscapes. Painting with acrylics especially using large brushes, takes much longer to finish than with oils. I painted a 9”x12” landscape the other day, which took me all day and started an 18”x24” landscape yesterday and just finished it today, late afternoon. Normally, I would have completed both of these paintings in about an hour using oils.

I would suggest giving large brushes a chance with acrylic painting for an alternative to the wet on wet. Just remember that each layer must dry completely before adding a new one otherwise you will become a mud mixer. Using large brushes in the same manner as with wet on wet is a bit more challenging and perhaps even frustrating for some in the beginning. I find it a thinking game and have fun just trying to figure out how to adapt a certain stroke used in wet on wet to acrylics. There’s no one out there to show me how to make it easier so it’s up to me to figure out the solution. The feeling is much greater after finishing a painting with acrylics than with oils because I had to figure out each step by myself. No copying here.

Here are a few of my earlier acrylic paintings using large brushes.


winter scene

hidden stream

learning from Bill Alexander

Black River

Black River

water falls at dawn


If you are still adamant and want to use the wet on wet technique using acrylics, you may want to try the Atelier interactive paints. Atelier Interactive is the only brand that can be used for controlled wet blending as well as standard techniques. Here's a link for their website http://atelieracrylic.com/products/atelier-interactive/ there are a few videos there as well,

Monday, January 25, 2016

analogy

 Since I started painting last July, I’ve completed seventy five paintings. Fifteen of them are in oils. I began painting in oils just before Christmas. In the beginning I had given away many of my acrylic paintings to family and a couple of friends. They were so impressed with my new found talent, that they just had to have some to display in their homes. Naturally, I was humbled by their want to display my creations and their response, once they saw them. Acrylics dry quickly and putting on a finish coat to preserve them didn’t take too long. Oils, on the other hand can take up to a year to totally dry. Putting on a sealer is not recommended for at least six months. They are unfinished and in the mean time, I keep painting new ones.

I have sold several of my acrylics to neighbors and other friends. They approached me looking to acquire some of my paintings after seeing them displayed in my family and close friends’ homes. I knew then and there that my paintings were something that I didn’t just want to give away for free. Paint supplies aren’t cheap and the time and effort involved in creating them should have some value to the public. I already have some future orders for my oils once they are sealed and dry from folks other than family and friends. I could have given them away, but if I had there wouldn’t be any value to what I do. It would have been demeaning and my efforts worthless. They would have just wanted more free stuff at my expense.

When I began my journey with paints, the thought of selling my art, never crossed my mind. All I wanted to do is find out if I could do it and do it well. I was curious to see where this new thing might take me…nothing more. I really didn’t have any thoughts on what I was going to do with the finished paintings and the idea of an art burning party did cross my mind. I had no value to what I was doing except in trying something I’ve never done before. The value came as soon as folks began wanting my art. That’s when I had to set the price on art, to give it value.

Many artists/bands in this case, on  music sites such as Sound Click or Sound Cloud, simply give their music away as a free download. What they are telling the public is that they don’t value what they do nor about the music. I learned years ago that the only time someone comes back to my music page was when I uploaded a new tune and had a free download. Once they had It, there was no reason to come back until I posted a new tune. I don’t know about you, but it takes me several weeks to write and prepare one tune for a recording session. There is a lot of time and effort invested just with one tune and I’ll be damned if I’m going to give that away. One or two free samples/downloads is my limit for the most part. As for the rest, I have to set some value to what I do as a musician. I've even made a few bucks doing it this way and have plenty of listeners and followers stopping by my music page at Sound Click just to check out my music.

The music business has really gone down the toilet in the past years and it's getting more difficult for musicians, full time musicians that is, to make a living at it. The big problem I've noticed is that young bands are willing to play for free just for exposure not realizing that they have fucked it up for everyone else trying to make a living at it. Sure a club or a bar owner is going to want someone to play for free, after all they have nothing to lose and only to gain a few more customers. In the long run bands playing for free are screwing themselves at the same time for future gigs for money. Let's face it these bands are saying that they have no value for what they do and are making the club/bar owners a little richer at their own expense. Stupidity

Friday, October 23, 2015

inexpensive paint palette for acrylics

Artist stuff can end up costing one an arm and a leg. It's not cheap being an artist. As a newby and retired I'm always trying to save a buck or two. I was using plastic and foam plates for my palettes but often times there just wasn't enough room on one plate and had to use several for what I'm doing. They just took too much space already in a cramped area I'm working in. I decided to make my own palette, customized for me. It had to be lightweight and made from inexpensive material. It also had to last for at least a couple of paintings.

I bought couple of pieces of foam board (poster board with foam center), the stuff you can find almost anywhere that caries office supplies. I got mine at Dollar Tree. The boards were 20" x 30" and cost me a mere $1.00 each.

poster board with foam center


From the 2 boards I was able to make 4 15"x20" palettes large enough to handle plenty of paint by cutting each board in half.

poster board with foam sandwich

They are easy to cut-simply with scissors to your own custom fit. The thumb hole, I used a 1 1/2" hole saw added to my cordless drill. I could have just cut out a hole using a utility knife. Using my cordless and the hole saw made quick work out of it and a perfect hole to boot. The corners were rounded off using scissors. What I couldn't cut with my scissors, I used my utility knife.

Because the top layers on the boards are very thin, putting any kind of sealer on them will make the top layer come off and the palate will become too flexible, altho the foam will handle the paint easily. Just go ahead and use the new palate as is without a sealer. It'll work just fine. When I can't remove anymore paint off it, I just throw it away and grab another I had made earlier.

Here is a pic of one I've been using. I made it so that I can use both sides when I need to.

my first foam board paint palette


Here are a couple of other styles I also made for myself. The thumb hole was cut out for a distance comfortable for me.

foam board palette

foam board palette I made
 I decided to take this project a bit further and make one out of 3/16" luaun plywood. I went to my local lumber store and got me a piece of luaun 24"X24" . I drew out how I wanted it on the board and then cut it with a jig saw. It came out 16" x 22". A standard size would be about 16" x 20 1/2". Next I sanded all the corners with coarse sandpaper and then filed areas I couldn't get in with my sand paper block. I also took some steel wool size 000 to the top of it to smooth out. Once I got it cleaned off, I took some clear gloss oil base spray paint to both sides and let it dry. The paint has primer included. On the face of the palette I put about 4 coats and on the back side 2. The sides also got the clear coat. Here's what it looks like after I got it completed. It wouldn't hurt to use the steel wool before each coat for a smooth finish.


wood paint palette I made from luaun

paint I used to seal my wood palate
For added protection so that the acrylic paints won't dry onto my palette, I rub on some wax, any wax just to put something between the paint and my palette. Now it's ez to clean the palette for my next painting. All in all, the wood palette cost me a total of $15.00, if that to make. To buy one, I've seen them go for over $40.00.