My Music My Art

Sunday, May 19, 2019

more on Cakewalk by Bandlab

I had some issues with crashes and was trying to get some answers from tech support. When I didn't hear from them, I decided to go into the forums and see if I could find some answers there. To get answers, I had to sign in or create an account for the forums. Apparently my account with Bandlab wasn't good enough so I had to create a separate account so I did what was needed to do so. Lo and behold after clicking on send, I received a message stating that I was not allowed to create an account on the site, in other words, I was banned.

I tried writing them to find out why? Never did receive an answer. I guess these people at Bandlab don't want to hear about problems with the program nor are they interested in helping out. Maybe I needed to kiss some ass first before attempting to report problems. I mean common guys, a company is only as good as the support team behind them. Sure I get it, the program is free so what gives me the right to complain about issues? Get answers in the forum right? But if I can't even do that because they banned me for trying to get answers in the first place, what am I supposed to do?

Cakewalk by Bandlab still has a lot of potential once they get many of the issues resolved such as crashing when using 2 TTS-1 soft-synths in the same project, or similar effects imported from third parties. Using just one TTS-1 doesn't always work especially if I want to add special effects on just one instrument because the way it's set up is the effect will affect all instruments. To resolve that problem, I had to solo the instrument and then bounce the entire project to bounce to tracks. By doing it this way, I now have a wave track instead of midi and can add whatever effects to it I want.

I had initially imported some effects from another music program I had and used them successfully on several projects. The other day, once I opened up Cakewalk and the project I was working on, it crashed. It asked me first, should it save a backup file for the project. I clicked yes because in the past I lost the entire project after clicking on no. It also showed me which of the effects was the problem causing the crash in my project and then created a mini dump. I was puzzled as to why this particular effect would make the program crash so I opened up another project with that same effect and no crash.

I decided to open up the backup file it had just created thinking that it might now work properly. NOPE! It too crashed and had to start all over with the same nonsense. Each time I opened up either the original project or the backup, Cakewalk would crash. This is what I've been dealing with since I downloaded Cakewalk. I had over 30 mini dumps and after inspecting each one, I still had no clue as to why this was happening. Musiclab certainly wasn't about to give me any help. They obviously don't give a rats ass! I couldn't find anything in the forums. Plenty of kiss ass stuff in there but nothing dealing with my issues.

There was no way I was going to open my project file without it crashing and I was furious and frustrated. I had spent days on it and was almost done. Now I'm going to have to start from scratch, no way, there's got to be a solution to this. I decided to go into Utilities\plugin manager and click on each of the plugins on the left column until I found the particular fx, causing the problem, in the right column. I highlighted the fx by clicking on it and then clicked on exclude plug-ins. My problem fx disappeared from the registered plug-in list and then decided to press the scan vst plugins. I closed the window once it was done and went to open up the project file which wouldn't open without crashing.

No problem opening it up and no crash! I located the now defunct fx and replaced it with a different but similar fx. The fx giving me issues was no longer on the list of fxs in my project.  I finished my project no thanks to Bandlab. No wonder it's free! Hurry up and get out the product, we'll worry about fixing it later seems to be the norm these days with anything you get!

Interestingly, they just came out with a new version of Cakewalk...2019.05 with many of the issues fixed I told them about and was trying to solve. We'll see how the new version works out in the coming days.

Features & Enhancements

  • ARA 2 (Audio Random Access) plug-in support. ARA 2 provides tighter, more efficient app integration of next generation ARA plug-ins such as Melodyne 4, including sharing tracks, regions, selection, as well as other project settings
  • Improved editing of ARA 2 regions with a shared view across all plug-in instances
  • Multi-clip slip stretching (hold down CTRL+SHIFT, then drag any selected clip edge to stretch all selected clips, or use the Stretch tool)
  • The global Timing tool has been renamed to Stretch tool
  • The Gain knob in the Inspector controls either audio Input Gain or MIDI Velocity Offset for Instrument tracks, depending on whether the Audio tab or MIDI tab is selected
  • Updated zplane élastique v3.3.0.23501 audio stretching and pitch shifting with bug fixes and performance enhancements
  • The Stretch tool (available by right-clicking the Edit tool in the Control Bar) now works on multiple selected clips, and also supports lasso selection and time selection

Bug Fixes

  • Clip Properties Inspector shows incorrect M:B:T clip length (actual length + 1 measure)
  • Step Record continues to record to the original track after you switch focus to another armed track
  • Arpeggiator Rate control fails to update when the parameter is automated
  • MIDI only projects are immediately marked as dirty on file open
  • Accessing menu commands can unnecessarily mark a project as dirty
  • Bounce to Clip(s) results in mono data if a clip envelope is selected; Bounce to Clip(s) is now unavailable if the selection does not contain MIDI or audio data
  • Intermittent crash when opening projects
  • Closing a project immediately after opening can cause a crash
  • Staff view fails to persist on project load
  • Opening lyrics view when transport is playing causes crash
  • Slip editing allows clips to be made zero length
  • Clip waveform sometimes disappears while slip stretching
  • Waveform display in split audio clip appears to adjust crop when slip stretching
  • Slip Stretching MIDI clip causes clip data to disappear
  • Slip Stretching cropped MIDI clip causes clip data to change unexpectedly
  • Undoing slip stretching of audio clips could sometimes not restore the clip to its original state
  • Slip Stretching clip to max, then dragging in opposite direction causes clamp to fail
  • After stretching a clip to the max 400%, releasing the mouse, then attempting to stretch the left edge further causes all stretching to get lost unexpectedly
  • Drag copying an ARA Region FX clip to create a new clip can result in a crash
  • Tracks still visible in Melodyne after deleting or freezing tracks with Region FX clips
  • Melodyne UI doesn't show slip stretching preview while editing until mouse up
  • Canceling from a slip edit or slip stretch doesn't restore ARA regions in Melodyne
  • When slip stretching a Melodyne Region FX clip from the left side, Undo does not restore the Melodyne data to its original location
  • Undoing a copied Melodyne clip leaves blobs visible in Melodyne
  • Cropping a stretched Melodyne clip causes blobs to shift unexpectedly
  • Melodyne does not update when changing clip start time or duration from Clip Inspector
  • Melodyne doesn't show preview while dragging Melodyne Region FX clips
  • Clip loses focus in Melodyne after dragging to a new track
There are still some display issues with some softsynths Even tho I can hear it, it shows that I've done nothing to the controls. Aria player for example shows the instrument tracks as being empty after choosing one. I can hear the instrument when I play the project.

Thursday, April 11, 2019

Cakewalk-band lab

I've been using Cakewalk/Sonar for years and now that my desktop quit working, I'm going to need to start all over on a different computer. I had plenty of files in Sonar and was just working on a project before my desktop stopped working. I went to cakewalk.com home page expecting to download the most current version/upgrade and found out that a new company had taken over. Sound Lab from Singapore took over Cakewalk/Sonar and is giving a free download to the new version. I had to download the soundlab assistant which after installing the app, asked me to sign in with either my face book account or Google account.

I chose my Google account as it was already open. I could not log in and just kept getting "please try logging in again" with no success. I tried contacting band lab only to go thru the same B.S. as it asked me to log in to my e-mail account. I found an e-mail address for band lab Admin@bandlab.com only to find that my e-mail came back to me. The reason? "We're writing to let you know that the group you tried to contact (Admin) may not exist, or you may not have permission to post messages to the group"

So...I'm wondering why is it that I can't even contact these people? Is Cakewalk by Sound Lab just a scam? I think that I will find another DAW to download as this one has definitely been disappointing!

All those great reviews you see on the internet regarding the DAW are probably phony! There are too many so called good reviews and not one reveling any negative aspects. Let's face it I've never come across a perfect software program yet alone a DAW . 

I decided to give it one more try at it, this time using my Facebook account and it worked. I was able to download the actual program and install it. There were a few problems in getting the right driver set up as it recognized an Asio driver and not the MME. There was no sound until I discovered the MME driver and switched it.

It's got nothing over on my Sonar 8.5 Producer DAW and for me it was a bit disappointing. To me, the new Cakewalk is perhaps a mediocre version without too many frills. I had installed 27 vst plugins and none of them were recognized. I did manage to record a new tune on it using 5 tracks and using some fx on the tracks and the Master Bus. I decided to export my new made tune as a .wav file but lo and behold it allowed me to export it as an mp3 file.

So far my observation is that the new Cakewalk by soundlab maybe okay for the beginner but I need something with a bit more meat to it.

I finally got a hold of support@cakewalk.com and have been corresponding with them regarding my issues with the DAW. I received some suggestions and after completing it and re-scanning for VST plugins, it shows that I have 162 of them. I have no idea where they are as they don't show up in the fx section nor in the insert softsynth area. The only ones that show up there are the plugins that came with the program.

The DAW is unstable and keeps crashing. Yesterday, it crashed 4 times. It's frustrating when you are in the middle of a project and the program crashes and then you have to start all over. Thus far this DAW is nothing more than mediocre at best with little help from support. I tried contacting support again only to find out that they put me on the spam list and now have no way of contacting them. I even tried to sign up for their forum only to find out I've been banned from their site. Ha Ha I guess I' m on my own! That's what I get for trying to solve some issues with Cakewalk's DAW. The DAW has a lot of potential to be a good one like Sonar but what do you expect from a DAW that was free?

There are a few good points in the DAW. Some of the softsynths, such as the drum and bass are awesome. There is even a string synth which I use often. The cakewalk default  softsynth which we saw in Sonar has been improved with some better sounds. My favorite is the jazz guitar. You can even add an amp simulator that comes as an fx to make it sound even more realistic.

There is also a piano softsynth which is missing the acoustic piano but the electric piano is okay and needs a bit tweaking which you can do. There's a couple of other softsynths which I haven't gotten into because I don't use them nor do I need them, however I will check them out and give you my thoughts on them a bit later.

Sunday, January 13, 2019

How well does Canson's water color paper work with acrylics
I had run out of my usual paper for acrylic/oil paints and stopped in my local Walmart to get another pad. Naturally, they had run out but had the water color paper. Since on the inside cover, Canson give this paper 2 stars and an excellent rating for acrylics and it was a little heavier weight paper, I thought I'd give it a try.

When I got to my studio I was eager to see how well it performed. I was disappointed! I
don't know where they came up with 2 stars out of 3 as I would only give it 2 out of 5 mediocre. The edges began curling and the center buckled and got worse the more I painted on it. After a while things leveled off after the paint dried up along with the paper.

I figured out how to eliminate some of the issues I had using it and am about 80% successful in doing so. I still get some curling edges initially with some buckling in the center but once the paper dries I have an easier time painting on it.

I prep both sides of the paper with either gesso or a thin coat of acrylic paint. I use water to thin either down even more than it is it and let both sides dry. To hurry things along, I use a blow drier. The paper is okay in a pinch, a bit larger than their acrylic/oil:11"x15" and a bit heavier #140.

I'm not one to waste anything nor my money so I continue using the water color paper until I run out. Later I found my normal paper at the same store and decided to hold on to it until I run out of the water color paper.

So....what was the outcome of my paintings after sealing them? Here, judge for your self.

acrylic painting on 11"x15" water color paper

acrylic painting on 11"x15" water color paper
Yup, all I use is AppleBarrel acrylic paints and gesso.

Wednesday, December 12, 2018

Yes, yes U can

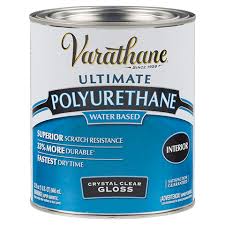
So the question is; can I use a polyurethane to seal my paintings? I contacted Rust-o-leum and they recommended using their Ultimate Water-based Polyurethane to seal my acrylic paintings. I was a bit skeptical at first but decided to give it a try anyway on a throw away painting so I went to my local home-improvement store and bought an 8 oz matte finish can of the Ultimate water-based Polyurethane. Make sure that it is the the Ultimate Polyurethane water based as below because there are many different Poly's which will damage your painting.

gloss can of Ultimate Polyurethane


It also comes in Gloss, semi gloss and Satin. There is an 11.5 oz. spray as well. I prefer not to use sprays because the spray gets into the air and spreads everywhere not only that but I end up breathing it in. I'm already battling cancer and don't need to add to it. The can stuff is milky white as I opened it and rather than shaking it, stirred was preferred. Read the label. I noticed only a light odor. Even though the color in the can is white, it brushes on clear. It won't yellow nor darken your painting in time.

I applied it to my painting that was on art paper with a brush and, wow!,the results were the same as if I used  known water based sealers acquired from art stores. I only put on two coats rather than 3 as recommended for use on wood. I figured that it would suffice for my purposes and made sure that it covered all of my painting well. I would normally have used this on my hard board panels but for my experiment I used special paper for art, I like the 11"x14" but below is a 9"X12".

pic of 9"x12" art paper


It did not change the color of my painting nor did it leave a film on it making my painting dull. It made the colors stand out rather than blending in as acrylics often do when using similar colors. The sealer actually brought out the colors and I could see them as individual colors.

The sealer dried within 5 minutes rather than the 2 hours stated on the can but waited the 2 hours anyway to put a second coat. I was impressed by the lack of strong lingering odor other sealers have. The little odor is tolerable and disappears within a couple of hours.

I'm very impressed by the Verithane Water Based Ultra Polyurethane as it did exactly what I was hoping for and recommended to me by Rust-o-leum. The stuff is however toxic before it dries so you don't want to inhale the fumes. I didn't have a problem with it as it was at my waste level all the time and the fumes stayed low to the can. Clean up was easy, just a rinse with water did the trick. I should point out that I used the sealer indoors and the furnace was just behind the door eight feet away.

I ended up sealing about 10 painting with the same results. I am impressed! I should point out that there is an oil based Ultra Poly as well which I will check out at another time. Try the water based poly on one of your throw away painting and see if you agree. The cost of it for an 8 oz can was under $5 at Menards. I would have never thought that I would be using a polyurethane as a sealer for my paintings. It's a keeper!

Here's a few paintings I did on paper using Ultimate Poly:

a painting with a Polyurethane sealer

a painting with a Polyurethane sealer  


Wednesday, September 19, 2018

FolkArt 789 Clearcote Acrylic Sealer Matte

I use a lot of Plaid paint products including folkart. I though that I would give their clearcote a try and found this:


WARNING: Cancer and Reproductive Harm – www.P65Warnings.CA.gov

Soft matte finish. This product may not be purchased by those under 18 years of age.

I got this :
  • Ideal for professional artists and decorative crafters
  • Soft Matte finish
  • For use on wooden, wicker, florals, metal, canvas or any paintable surface
  • Non-yellowing finish
  • Waterbased-non-toxic 
from Amazon.com. where I purchased my 12 oz can. Notice it says non-toxic just above and yet Plaid has a warning that it can cause cancer etc. and may not be purchased by anyone under 18.

folkart 12 oz can of clearcote


I used the matte on several paintings and noticed a very strong and lingering odor. As always I use any of these sealer's outdoors. It's as bad as using turpentine indoors to clean your oil brushes, it'll smell the entire house. This, like other sealers is also highly flammable and could easily start a fire if you have a furnace or a water heater with a pilot light. DON"T DO IT! USE IT OUTDOORS!

Not only did I use this stuff outdoors, I also wore a painters' respirator to eliminate the breathing of any of the mist. I already have one form of cancer and don't want to end up with lung cancer as well.

So how'd the stuff work out? It's probably my favorite to use as it has an outstanding result. For oils I would suggest Krylon Kamar varnish. This is only meant for water based paints.

The colors are bright and vibrant and even the colors that ended up almost hidden in the background became clearer. It does not change the colors nor does it yellow. It does give you a much wetter look which has to do with bringing out contrast as in a photo shop program.

I don't recommend using this clearcote or others unless you are willing to go the extra mile to protect yourself, from the hazards involved, which most of you won't. They can make a non toxic brush cleaner for oils and yet in this age, they can't do the same for a sealer/clearcote spray for acrylics and oils. So are they waiting for more people to die from cancer before it happens? Crazy!


Saturday, September 15, 2018

Plaid Patricia Nimocks Sealer

Durable, clear coating that seals prints, also for use over paint, lacquer, and varnish. Use as a sealer on bisque and stain-finished ceramics. Preserve maps, documents, prints, etc. This clear, waterproof sealer produces a non-yellowing finish. May be used as a pastel fixative or over antiquing glazes and stains. An ideal quick finish for wood, glass, metal, cast resin or plaster. Available in gloss or matte finish. Comes in 6 or 12-ounce aerosols spray.


I tried this on my paintings. It has a very strong and lingering odor so use it outdoors. I use it outside or in my garage with the door open and a painters' respirator. It is extremely flammable and toxic but seems to have a better odor than most sealers I've used.  A second coat can be applied in 5-10 minutes. The can does not say non-yellowing however  that's what is said in the description of the item on Plaid's website. https://plaidonline.com/products/plaid-patricia-nimocks-clear-acrylic-sealer-glo

My can says Matte. To me matte means no sheen or gloss but after sealing a couple of paintings there seems to have a semi-gloss look to them I did not wait several hours to see if the gloss goes away. I will see tomorrow. No it did not! But the odor had dissipated down to a level where I was able to take my paintings back indoors. I'll just deal with the sheen for now.

Just like other acrylic sealers, it brings out the colors and clarity of the paint in my art. We all know that most paints darken as they dry so it's a good idea to seal your paintings for a fresh brighter look.

If you don't care whether the finished product comes out matte or glossy then I would say go for it, it's a good product that goes on easily.


Tuesday, September 11, 2018

Aleene's Acrylic Sealer Spray Matte 6oz

I've used both the gloss and matte finishes on my paintings. I prefer the matte. It's intended to seal acrylic paints from moisture. It has other uses as well but I use it for my art. Aleene's comes in a 6oz can.

Aleene's Spray Acrylic Sealer

Here's what they say about it:
  • Acrylic sealer spray provide a protective, clear finish
  • Give a glossy luster to virtually any indoor or outdoor project
  • A durable protective finish
  • Spray on formula goes on simply and evenly
  • Contains no cfcs-in accordance with federal regulations
  • Applies clear and dries matte
  • Spray-on formula goes on simply and evenly. 
Since acrylic paints have a tendency to darken when dry and you end up losing some detail in your paintings, Aleene's spray sealer brings everything back to how they were intended before the paint dried. It will not yellow nor change the color although it will bring out more contrast into your paintings. The contrast is what most people might think that it has changed the colors while actually bringing back the hidden ones. For some, your painting may look wet.  I use it on most of my acrylic paintings.

It may not have cfc's however the spray is toxic and has a lingering odor which will last several days. I recommend not using it indoors due to the toxicity and flammability of the sealer. I use it in my garage with the door open and wear a painters respirator mask. Instead of using my finger to activate the spray nozzle, I use a hand trigger mechanism as seen in the above pic. not only for better control but to keep the spray off my finger.

The sealer dries in just a few minutes and spraying several layers anytime, even when wet is not a problem. Once the sealer is dry and the odor has dissipated, I can take it indoors and admire the awesomeness of the painting.

Since I use it on my artwork, I can recommend it especially for paper and hard board panels. It works on canvas panels and on canvas but will need a few extra layers. By the way since it is a sealer for acrylics, you can still make a few touchups on your painting afterwards, should there be a need by painting right over the sealer. You can always use the spray again to go over the touchups you made using acrylic paints without a problem. I've done it several times and had none!

Since there was no mention regarding  best temps for spraying, I contacted Aleenes. I was told that as long as it's above -31F I should be okay. But I'm a bit skeptical about that claim. I will try it on a painting in the next few days at temps in the mid 30's F.

Update Nov. 15, 2018

It was about 33F outside today and I was eager to see how well Aleene's clear matte sealer might work in the cold.  I went into my garage, put on my painter's respirator, shook the can and began to spray. I was impressed! I had no problems and after spraying my acrylic painting with this sealer, it dried within 15-20 seconds. I was able to spray 3  coats within just minutes. I ended up sealing 3 16x24" within 10 minutes.

Due to the strong lingering odor, I left the paintings in my garage with a fan blowing on the paintings for several hours to get rid of the smell. When I took the paintings in, they were cold and let them warm up. I had no issues. So for now I think this will be my new favorite sealer for my artwork!

Saturday, September 8, 2018

can I use Rust-Oleum clear coat on my artwork

I've been wondering about that myself for a long time and decided to try it. Why not? After all it is 3x cheaper than other sealers of the same size used in art. I found a can of Rust-Oleum 2X clear Satin spray paint in my studio so I decided to give it a try.

Rust-Oleum Painter's touch 2X Satin Clear
I chose more than one acrylic painting for the experiment. I knew I could retouch them if it didn't work out since the sealer is a water base product.

After spraying a few paintings with this stuff, I decided to stop. The first one went on fairly easily as I sprayed very thin layers but I noticed the painting became cloudy after my last cover. I figured it needed to dry for a few hours so I set it aside and sprayed my second painting.

The spray didn't come out even and there was more of it in spots so I decided to just leave one coat on it and let it dry. The paint has a very strong lingering odor so I had to let the paintings sit in my garage for a few days to air out before taking it inside to scrutinize them.

This spray paint is toxic so whether you use it for other purposes, do it outside or in a garage with the door(s) open. I also wear a painters' respirator to keep the mist out of my lungs.

After a few days,I was able to take the paintings indoors and compare them to my other paintings I've sealed using acrylic sealers for artwork. Most of my acrylic paintings are either on canvas boards or hardboard panels I made for painting. In comparing the Rust-Oleum clear coat, the other paintings looked much clearer and brighter. The colors with the Rust-Oleum seemed to be faded and have a cloudy look to them.

In conclusion: Rust-Oleum Painter's Touch, 2X, Clear is not a good choice regardless of price. It does not go on or dry crystal clear as do other acrylic sealers made for acrylic paintings so I can not recommend using it on your artwork. Spend the extra money for a good acrylic sealer, yu won't be disappointed.

Friday, August 31, 2018

a review on Matisse colored gesso

I used to watch Bob Ross videos on YouTube and used to always say that you can paint an entire painting using just acrylic gesso. Bob of course used white and black in his day for his backgrounds. Since then, there are many other colors to use. In finding some of Matisse gesso in my studio from my earlier experiences in painting, I decided to take a visit back to the Matisse colored gesso and do a couple of paintings.

Matisse colored gesso

I found that the lids were difficult to open as the gesso had dried them shut since the lids are a screw on. Once I opened the plastic container, the color had separated from the gesso and I needed to stir them for several minutes to get the consistency back. As I recall the same was true when I first acquired the gesso.

Matisse says to use the gesso right out of the container which isn't always such a great idea for obvious reasons. If you pour the gesso out from the container, you will have it all over the tip where there are screw ridges for the lid. They aren't the easiest to clean and when dried up especially after you have screwed the lid back on, you are going to have some difficulty getting the lids off.

The second thing I noticed after getting the lid off was that there was a definite odor in the gesso. It was the same strong odor as when I first got them. For me it was strong enough to bother me as I am sensitive to strong odors, hence oil painting is no longer in the cards for me. I suppose that was one of the reasons I stopped using Matisse colored gesso. But for my experiment, I decided to use them regardless, turning on my 2 exhaust fans in my art studio, which cut down some of the odor.

The gesso goes on very smooth and is lot thicker than the cheap white gesso (Daler-Rowney) you get these days from big box stores like Walmart. I hardly ever use gesso anymore as many of the pre-stretch canvases and boards already come ready for painting. I mainly use the gesso for mixing and lightening my acrylic paints.

The Matisse colors are very vibrant and do not darken as do many of the acrylic paints. I can mix them with other acrylic paints or the gesso for different colors. I can also add a little water to thin it out. The gesso dries just as quick as any other acrylic paint or gesso. I like using the gesso but using it right out of the container especially if I want to mix it with different color or water just will not work. My problem is with the screw on caps that dry shut after pouring. Let's face it, how many of you are willing to take the time out to really clean the caps and the edges of the container before putting them away. Not me, I'm way too lazy for that! You will need to find an alternate way to move the gesso from the container to your palate. My other problem is with the smell. If it wasn't for it, I would probably use it more.

Below are the two paintings using Matisse colored gesso. Both have been sealed with an acrylic sealer.

painting using colored gesso

painting using colored gesso


Wednesday, August 22, 2018

this is cool,ya gotta try this

I had purchased some paint from my local home improvement store. It was Rustoleum Multicolor Textured paint. It has sand embedded in the paint. I had an idea to try and use it for some texture on my next painting. It was going to be something in a beach scene with sand. I've used other Rustoleum non oil paints in the past for a sealer for my home made art panels and never had any issues so I thought I would try the textured paint (for rust control).

Rustoleum paints
I had a specific painting in mind which included Lake Michigan and a lighthouse with some sand dunes. I sprayed some targeted areas with sand colored textured paint after sealing the panel with a matte grey colored 2X paint following directions on the can. I had also drawn a preliminary sketch and taped a few areas I didn't want the paint to go on using masking tape. I had also painted my sky adding clouds in appropriate areas. No need to mask off the sky as the spray paint can cover some of it.

areas painted with textured paint
If you take a close look at the above pix, you can actually see the sandy texture on my panel. It even creates it's own shadows. Yes, you can paint over this paint without issues and you can paint over acrylics as I've done it often, but make sure you give it a full dry of 48 hours before painting over it, same goes for the acrylic paint, if spraying over it with the Rustoleum.

There is a lot of pressure in these spray paints with texture so control might be an issue for you. I solved my problem using this (below).

a handy spray can handle with trigger
This handy spray can handle w/trigger will fit just about any spray can giving me the perfect control I need for using sprays. It only cost me a few bucks.

So here's my painting a 24"x30" on a home made hardboard gallery panel.

painting using textured paint


Here's another one I did using the same textured paints.


a beach area from the sand dunes painted using textured paint.


Tuesday, August 7, 2018

Is it worth making your own hard board paint panels?

In the beginning, I used to buy pre-stretched canvas and or canvas panels. Today I make my own paint panels from hard board. I like to make my own gallery paint panels which are 1 5/8" thick and either 18"x24" or 24"x30". I can buy a 2'x4' hard board panel for just a few bucks and the wood for a little over that each. I find that the darker panels work better for me than the light colored ones as the light colored panels have a lot more dust flying around which is a health hazard.

I use 1"x2"x96" clear pine for the backing and edges and cut them to size and then glue them in place with a good wood glue.  It doesn't matter whether you use a butt joint or a miter. I use miters because I've been a carpenter and a wood worker for decades and am used to cutting miters with my power miter saw. To seal everything I'll buy a can of Rustoleum gray matte 2X Painters Touch all purpose spray paint. All in all the entire panel will cost me a fraction of what I would pay otherwise. I can get 2-18"x24" and one 12"x24" panels or 1-18"x24" and 24"x30" panel off one 2'x4' hardboard panel all for under $15.

The spray paint will adhere to just about anything and as long as it's not an oil base paint, I can use acrylic paints over it without having to gesso the entire panel. Acrylic paints also will adhere to just about anything so gesso isn't always necessary. One thing I might advise you on is to follow directions on the spray paint can. For a second coat do it within an hour otherwise you will need to wait 48 hours before applying a second coat. For that matter, I will wait 48 hours before beginning to start my painting to make sure that the paint had dried fully. I have not had issues doing this yet!

gallery art panel from hardboard


back side of gallery art board

front side of gallery panel with face sealed

paints I use to seal my paint panels along with a paint can trigger

I use the paint can trigger mechanism for better control. Some of the paints have so much pressure that getting good control and accuracy is a bit difficult. I don't need to be fighting with spray paint. I have enough problems just using the spray cans so the trigger handle works like a charm and with any other spray paint and sealers. It cost me only a couple of bucks. Using a painters respirator with any spray paint or sealer is a must regardless where you spray. I spray in a well ventilated garage and keep the door wide open. Even then there is always spray mist flying around not to forget about the strong odors. The mask keeps my lungs free and clear of any deadly mist from spray paints.

Here are a few paintings I did on my home made gallery hardboard paint panels using acrylic paints over Rustoleum Painters Touch all purpose 2X paints with no gesso.

painting I did on a home made paint panel

a painting on a 18"x24" gallery home made panel

another painting on a home made panel

an acrylic painting on a gallery home made art panel

Sunday, July 22, 2018

Comcast XFinity review

I have XFinity for my internet access and land line telephone. The service for both in the last 2 years have been very reliable and have had no issues with either.

We are seniors with a fixed income living on a budget. I told them that when I had xfinity put in. In the 2 years there have been 3 increases in cost of service even tho I was supposedly put on a fixed price. I've talked with other family members and friends and they all tell me that Comcast/Xfinity is a rip off! They, like ATT lure you in with a cheap price and then as soon as they can will increase they're prices. The increases aren't nickle and dime you to death, but substantial Anywhere from $30-$50 like my recent bill showed. We had a 45% increase. They will do this without advance notice as with me.

So, when I called them up I was told that my promo had expired and need to call them every year for a new promo. It's not like you're locked in for several years. It's a game they play with you to make more money off you. They also set these promos in a way that you have to sign up for a bundle in order to save. You can't just sign up for internet because it's more expensive than having a bundle. I have phone and internet service thru Comcast and wanted to delete the phone service. They told me that I would not save anything if I did and basically I could not just have internet service. If I really pressed it, the cost would be the same as with the phone service, so the phone service is basically a give away according to them. I just don't buy that!

My promo ended up being $10 more than I had up to this point which also increased all of the other fees along with equipment rental, another rip off! The modem rental is now $11 a month. I've already paid 2 years rental at $10 or $240. The modem costs about $180 so by the time I'm done with my new promotion I will have as well bought 2 modems. One positive outlook on this is that my speed went up from 60mbps to 150 so I can look at it as if I'm paying $10 more a month for service supposedly over twice as fast as I had. So far I have not seen any difference!

If you are expecting to get the speed you think you are paying for remember that the words are up to. I don't know anyone who actually gets the speed advertised or they are selling. I'm constantly doing speed tests from different devices. My desktop, using a 300mb wi-fi adapter shows me getting anywhere from 60-84mbps download with around 12mb upload with a 150 mbps service. I haven't seen anything above a 100mbps yet. My lap top with a 300mb wi-fi capability shows under 50mb download and a 12-13mb upload. My tablet with a 150 mb capability shows between 30-45mb download and between 6-8mb upload.

I was told that I would receive a new bill and just to disregard the one with the 45% increase as it would be adjusted. I waited and waited...no bill. We got the new bill the other day, no adjustments and a bill for almost $200 for 2 months service. I should have known they are crooks before signing up!

If you have something else available in your area, try them first. I can't recommend Comcast nor ATT. I had ATT and had plenty of problems with their service due to old lines. Even after they replaced the wires, we had issues and lack of service. They are not very reliable! They will however nickle and dime you to death with their increases in time.

my review of Netgear A6210 USB WiFi Adapter

Here's what Netgear says about it:

"802.11ac Dual Band with High Gain Antenna
Your PC at the Speed of AC. Now Faster with USB 3.0
When it comes to connecting online, speed is everything. Now with this AC1200 USB 3.0 adapter, you can make even your older Windows®-based laptops and desktops connect at the speed of 802.11ac, the world's fastest WiFi technology. Increase range with high gain antennas, and with USB 3.0, you can connect even faster than USB 2.0. Just plug this adapter into a USB 3.0 port and enjoy faster browsing, streaming and gaming. Compatible with USB 2.0 and the latest 11ac WiFi devices and backward compatible with 802.11 a/b/g/n devices."


NetGear A6210 Genie


I use it to gain access to the internet thru XFinity WiFi at 60mbps. The Genie is connected to my desktop with Windows XP Pro with all the updates until Microsoft stopped updating it. I also use FireFox ESP 52.9.0 (32 bit) USB2.0

The Genie as far as I am concerned is a piece of crap! Each time I want to use my desktop, I have to go thru a routine of connection repairs before it works. Ever since the last Netgear update on it, I've had nothing than problems with it. It has been very unreliable. Even when I am on the internet, I can lose the connection at any given point in time. As a matter of fact, I just did a few seconds ago and had to do another connection repair. I have no problems using my other computers using the XFinity router/wifi. The problems are with the Netgear Genie.

I don't recommend this device for anyone using the USB 2.0 even tho the device is supposed to be compatible with all Windows and both USB 2.0 and 3.0.

Wednesday, July 11, 2018

Canson® XL® Oil & Acrylic paper review

Canson® XL® Acrylic features a bleed proof, canvas like textured paper that is ready to use with oil or acrylic without the need of priming or preparation and it's my favorite paper to use. There is only a minimum of curling on the edges and is easily straightened out The weight is 136Lbs for both the 9x12" and the 11x14". One side has more texture than the other. Either side can be painted on. There are 24 sheets in both pads. I paid just under $10 for 9x12" and $12 for the 11x14" at my local Walmart.

I can easily recommend either sizes of this paper as there is no prep involved and I can use either oil or acrylic paints or both as in wet on wet technique. The paper will stay sturdy throughout my painting and don't have to worry about warping

Here are some paintings I did on the Canson XL Oil & Acrylic paper. They are all painted with Apple Barrel acrylic paints by Plaid.

male and female cardinals

male cardinal

chipmunk

squirrel looking out of a hole in a wall

my backyard squirrel sitting on a fence

sunlight between rocks

tall ship inundated by a huge wave

tall ship getting hit by a huge wave


Sunday, July 8, 2018

Folk Art acrylic paint review

Paints are rated on a light-fastness scale that runs from 1 to 5.
1=Excellent
2=Very good
3=Good
4=Fair
5=Poor

All of the Folk Art Acrylic Paint Colors are rated Excellent or Very Good (1 or 2). These paints are made from some of the purest pigment available, which results in its superior quality.

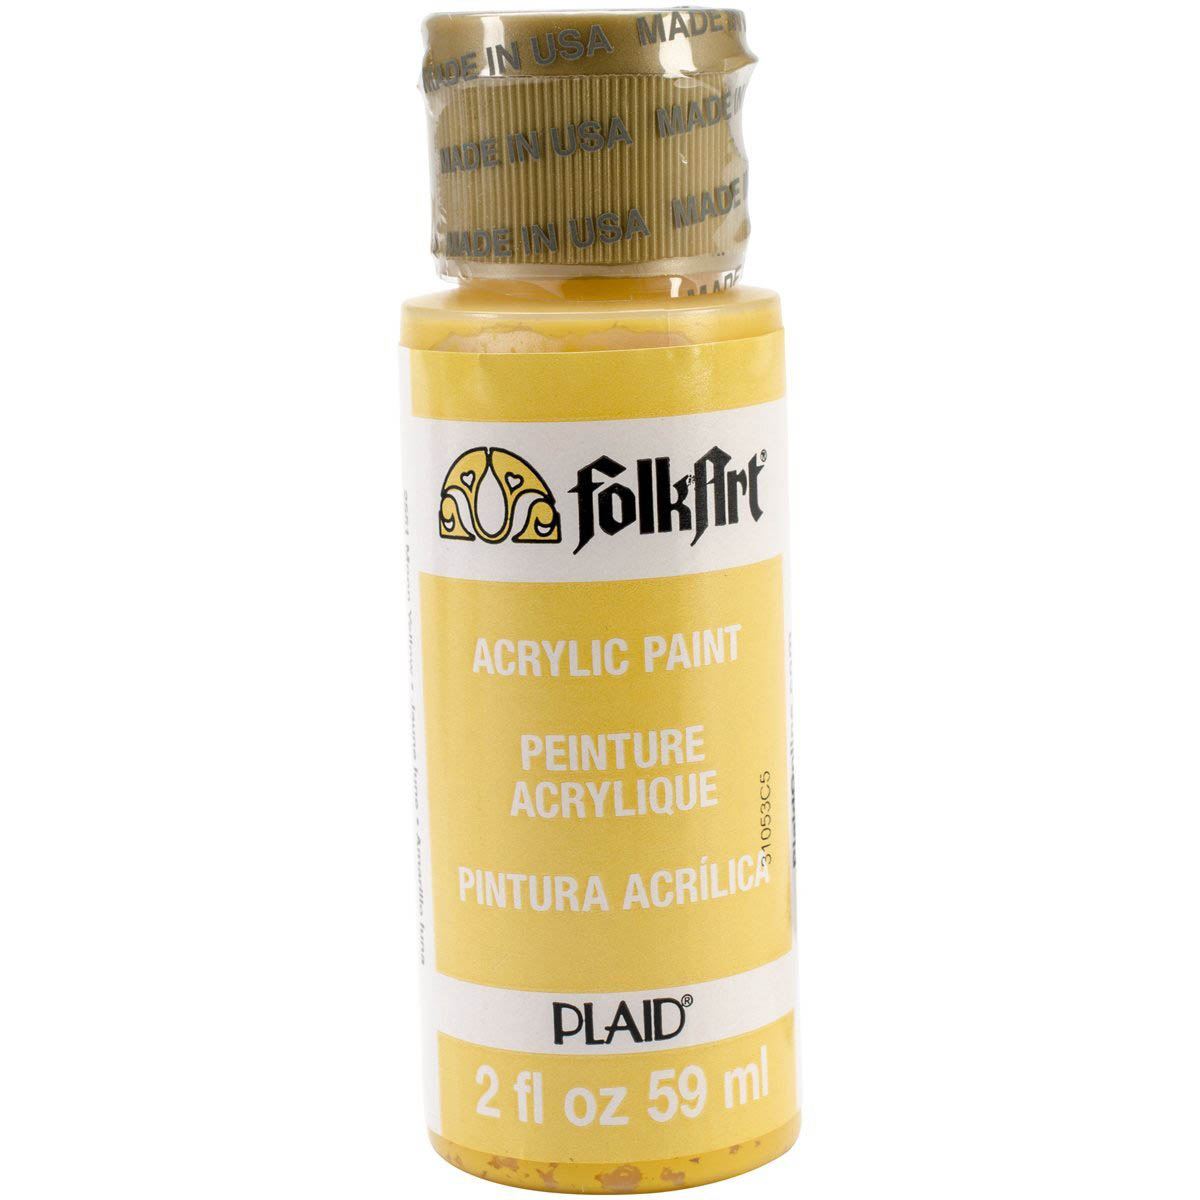
folk art paint
This acrylic paint is thicker than the Apple Barrel acrylic paints, are slightly thinner than traditional acrylics and comes in a variety of colors and finishes. I like to use the matte finish since it's going on a painting and when dry, it gets a gloss sealer. Other finishes would be a waste of money for me for obvious reasons. I pay under a buck for each matte color at my local Walmart. The paint goes on very smooth and makes knife work a bit easier.

I could just use the Apple Barrel acrylic paints but every now and then I need something a bit heavier in viscosity so I turn to folk art paints. I've done plenty of paintings just using the folk art paints. The colors as with any acrylic paint dries darker than what you see when pouring it out to your palette so you may need to make some adjustments to enhance the color by adding a little white or yellow depending on what you are striving for. I usually end up having to add a few layers to my forefront to make them stand out. Often times the painting might look darker than I expected but when I add my acrylic sealant or a gloss varnish the colors seem to pop a bit more.

I do recommend using these paints. They are fairly inexpensive compared to the ones in a tube. They come in 2 oz and 8 oz bottles and are pour-able. The colors are vibrant and the paint has superior quality as the one's in tubes. Below are a few paintings I did using just the FolkArt acrylic paints by Plaid.

painting with FolkArt acrylic paints

painting with FolkArt acrylic paints

painting with FolkArt acrylic paints

painting with FolkArt acrylic paints


Saturday, July 7, 2018

Daler/Rowney acrylic paint paper review

Recently I stopped in at a local Walmart to buy an art paper pad for acrylics. I had used up my last paper and needed to stock up with my usual 9"x12" pad. I like to use these special papers for painting as they are inexpensive, light weight and are easy to store without taking a lot of space like stretched canvas would. Paintings look great on this paper and the colors get enhanced so much after putting on a sealer that sometimes it's hard to tell if the paint is oil or acrylic.

I paint for the sake of painting and unless I'm commissioned to do a painting, I"ll paint on paper. I live in an area where people will not pay much (over $50) for a painting, so I can offer them paper instead as long as it's good quality and has some decent weight. Weight of paper simply is determined how much pressure is used in creating it, i.e. 60# paper = 60# of pressure to make it. The higher the pressure the better the paper.

When I got to the area where the paper pads were, my usual paper pads were out of stock. All they had was Daler/Rowney 9"x12" Acrylic paper pad.

acrylic paper


I like to cut these papers into 8"x10" for inexpensive frame options as one can find them just about anywhere for fairly cheap. This paper is 115lb and come 10 sheets to a pad. My price was $2.97 + tax. It was cheap enough to give them a try to see how well this paper performs compared to my usual ones. I was in a pinch and didn't have time running around looking for my usual papers, so I bought one pad.

The next day I decided to try a sheet out and compared it to what I was used to. The paper was much thinner and smoother. Once I started prepping my paper with a thin layer of gesso, the edges began curling and the middle buckled out. I had also used some masking tape for a straight line, for an ocean horizon, which I do often with my other papers. When I pulled the tape off, it pulled a layer of paper along with it. I also tape the corners down to keep the paper flat and so that it won't move and was worried that the tape would pull off a layer from my corners.

During the course of painting on this paper, I notice that things just began getting worse with warping. It would even undo the taped corners from my table as I painted. Each time I painted a layer I would have to stop and let the paper dry totally, before continuing otherwise I'd have a rolled up piece of paper. To solve the problem of warping on my next painting, I added a few layers of gesso on both sides of the paper. That seemed to have eliminated some of the problem. With thicker paper I've never had a problem of warping nor the need for gesso. The papers come ready for painting.

Once I finally got my painting done, it looked good but the paper was rolled up after drying. No....I do not like this paper by Daler/Rowney nor do I recommend it! There are much better papers out there available. Here is a link regarding painting on paper and the outcome: http://www.justpaint.org/paper-warping-when-painting-with-acrylics/

Monday, July 2, 2018

Apple Barrel Paint Review

I do a lot of painting and most of it is done with acrylics. Unless I'm doing a commissioned painting, I will only use either Apple Barrel or Folk Art acrylic paints by Plaid.


I've had a lot of good luck using them, I like them and best of all they won't cost me an arm and a leg. As a matter of fact I pay 50¢ for Apple Barrel matte colors and 97¢ for the gloss paints at my local Walmart. I use the 2oz bottles although some come in 8oz bottles for a bit more than I would pay for 4-2oz bottles. There is a satin finish paint in the 2oz bottles which cost me about $1.29 a bottle. Prices vary from location to location so what you might pay for a 2oz bottle might vary.

Paints are rated on a light-fastness scale that runs from 1 to 5.
1=Excellent
2=Very good
3=Good
4=Fair
5=Poor

All of the Apple Barrel Acrylic Colors and Apple Barrel Gloss paints are rated Excellent or Very Good (1 or 2). These paints are made from some of the purest pigment available, which results in its superior quality.

I currently have at least 75 bottles and half of them are unopened. Since I paint daily, I go through a lot of paints and don't want to take the time out to run out and buy more if I run out during a painting. Whenever I'm in a Walmart, I'll just go ahead and buy a few bottles that I use more often. The problem with Walmart is that the paints seem to be out of stock often, that's why I stock up in advance. I know buying them on the internet will cost me  a lot more.

I've used them on just about every kind of painting from landscapes to portraits. The Apple Barrel paints are thinner than the traditional acrylic paints but work just as well for what I do. I've even used them on crafts and as long as I seal the paint with an acrylic sealer or varnish, they will last me a life time and then some.

I did have a problem about a year ago with the paint. They would smell like rotted flesh in the bottle and after I applied the paint. I contacted Plaid and received 50 new bottles for replacement. Fortunately I had a receipt for them all. Their answer for the smell was that someone had exposed the paints to extreme temps but I doubt that was the case. Never the less I have not had that problem since.

Here are a few paintings I did using just the Apple Barrel Matte acrylic paints.


squirrel in my backyard

Luna our dog

a bright fall day

a walk thru the forest preserve

melting ice on the lake

mountain side brook

sunrise at fall